Cry 'Havoc'! Let loose the dogs of war!
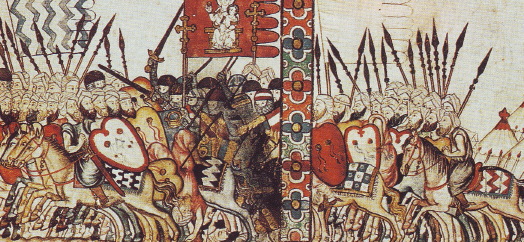
This campaign was dreamed up for a couple of reasons. Firstly, I am very interested in the Spanish Reconquista. Secondly, one of the players in my local group was planning on painting some Pre-Feudal Spanish (DBA III/35c). I already had an Andalusian army that could easily be morphed into a Granadine force (IV/38), and so the campaign was born! Also, this period, from roughly 1200-1400 represents all the armoured knights and free lances that everyone loves!
| Name and DBA Army | Starting Cities | Player Name |
|---|---|---|
| Aragon Spain III/35c | Sargosa (capital), Barcelona, Valencia, Cagliari | Don Juan Dangeroso |
| Leon Spain III/35c | Leon (capital), Burgos, Oporto | Roberto the Bold |
| Castile Spain IV/68a | Toledo (capital), Madrid, Cordova | Marco Polo II |
| Granada IV/38 | Granada (capital), Almeria, Algecira | Ibn al-Joe-ahmar |
| France IV/64ab | Paris (capital), Toulouse, Avignon | Black Jacques Shellac |
| Holy Roman Empire IV/13b | Strassberg (capital), Marseille, Pisa | King Mike-Frederick IV |
| Sicily IV/5bc | Palermo (capital), Girgenti, Syracuse | King Seanmund I |
| Naples IV/61 | Naples (capital), Feggio, Aquila | Mark-Charles II |
| Kingdom of Mali III/68 | Taghaza (capital), Tunis, Tangier | Kankan Corymusa |
For a map of the initial positions, please see this link.
Given that the period over which this campaign ranges is quite large, the armies involved are not a perfect match to each other necessarily. However, it is a great way for more people to get involved and the time period, although it does represent a time of great change, also is commonly lumped into the vague *high medieval* period.
The beginning of this campaign will be marked with the year 1300, although as was stated before, the exact dates are inconsequental really, except to be able to report the progress of the campaign itself.
The campaign will be played for at least two years. In the DBA campaign rules, each year is made up of three rounds corresponding to the seasons of spring, summer, and autumn. A two year campaign will therefor give players six turns each. There is an option to extend the campaign; if the players are still interested and available after two years, we can extend the timeframe.
At the end of the campaign, the player with the highest prestige point total will be declared the Circa 800 Hardrada! (aka, the winner). Prestige points will be alloted in the following two ways:
For the most part this campaign will follow Phil Barker's campaign rules as outlined in the DBA Version 2.2 rule book. There will be a few additions to the rules however to add flavour to the campaign and perhaps context for the period. The additions and other explanations specific to this campaign are outlined below.
The final, and perhaps most major change to Phil's rules will be that the player movement/invasions will be carried out simultaneously within each season/turn. That is, instead of having each player play their move while others wait, each player will carry out their moves/invasions/etc. at the same time. The following procedure outlines how this will be carried out.
Each player will fill out a sheet with the following information at the beginning of the season/turn:
War Declarations work as per the rules outlined in the DBA V2.2 rulebook, and are only made in the spring. Also, if you declare war on a faction, then that faction is automatically considered to have declared war on you. You current army location is the city where you army resides at the beginning of the turn.
The actions that you are allowed to take during a turn are either invade, move only, or defend the realm. You can carry out only one of those actions. If you choose invade, then you must move into a city controlled by another player/faction. If you choose to move only then you must move into a city that you or an ally controls. If you choose to defend your realm, it works as follows: once the movement of all armies has been resolved, the defending player can move their army up to make battle on an army that has invaded their lands, or fortify a city that will stand a siege. If more than one army has invaded their lands, the defending player can only choose to make battle with one of the invaders, not both.
The Destination City is the city that your field army will end up in at the end of the army momvement phase. If the action was merely to move, then the destination city will have to be a city that you control or one that you have permission to be in. If your action was to invade, then the destination city is controlled by a faction that you are at war with.If two armies invade each other along the same route, then a collission may occur. If this occurs, then the players will do battle and the winner will automatically take their target city, and the loser will be driven back. To illustrate, imagine King Seanmund I of Sicily attempts to invade Feggio from Syracuse, while at the same time Mark-Charles II attempts to invade Syracuse from Feggio. The two armies do battle somewhere inbetween the cities. The attacker is determined by a roll off. If Mark Charles is victorious then Syracuse will be captured by him and Seanmund's army will have to retire to either Pilermo or Girgenti. If Seanmund is victorious, then Feggio will fall to Seanmund and Mark-Charles' army will have to retire to either Naples or Aquila..